Many older hang glider pilots (over forty) need big screen instrument displays or distorting progressive lenses. Here is one way to get really big numbers and maps on a 150mm screen. As a bonus, it's cool being able to read a novel on your vario while waiting for the retrieve car.
Tip: Click the images below to zoom, use your back button to return.
| Task | How | Why | Care Points |
|---|---|---|---|
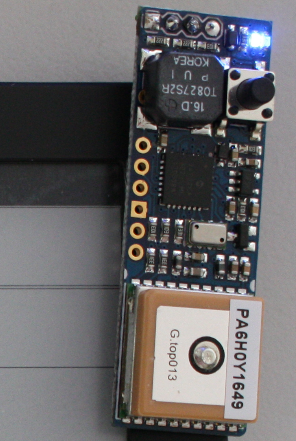
Buy a BlueFlyVario_TTL_GPS_v12 from the amazing Alistair in Canberra.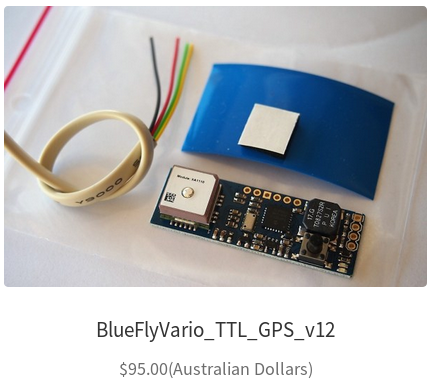 |
https://www.blueflyvario.com/shop/ | Consider purchasing an anemometer at the same time. | |
| Charge your Kobo e-reader, connect to WiFi and update the firmware. | Just follow the instructions in the box. | ||
| Download a book and read it. | https://www.gutenberg.org/ | You are about to void your warranty. Before doing that, make sure the screen, battery and touch sensors are all working. | |
Remove the back of the case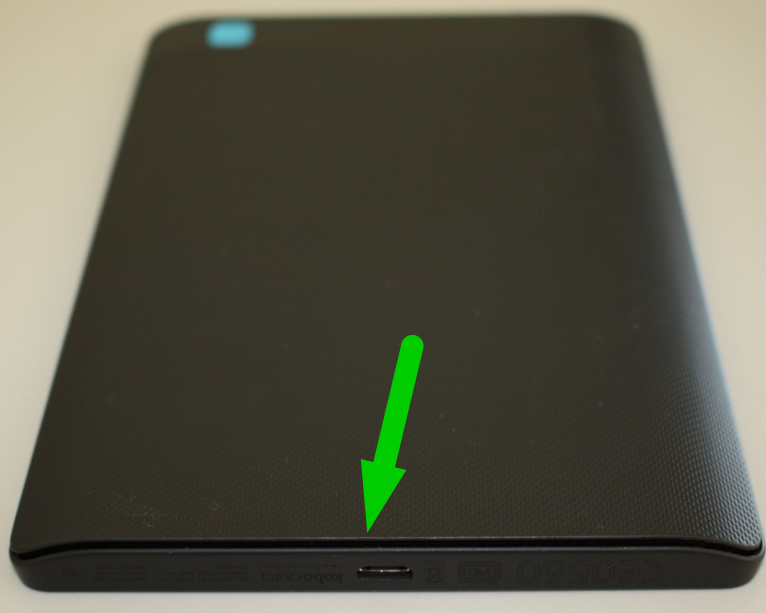 |
Use your fingernails and thumbnails | You can feel how much pressure you are exerting. If the pressure is too high, try another point. | Kobo engineers have broken many cases. |
| A tool may be inserted too far, damaging the screen connector ribbon. | |||
| Start away from a corner | Corners have more bosses. |
||
Remove the micro SD card and make a full disk image of it. |
On Linux, $ sudo dd if=/dev/sdX of=/home/yourusername/KoboSDCardBackupImage bs=4M where X is your card. If you have Microsoft Windows, search for a disk imager and watch out for viruses. |
The image can be written to a new SD card if you need to start again. | |
| Install XCSoar software | Look for XCSoar on Kobo at https://xcsoar.org/download/. To install, copy KoboRoot.tgz to the data partition to a directory called ".kobo" (note the leading dot; the directory already exists, but is hidden). Reboot the Kobo. | ||
Unplug the battery lead from the circuit board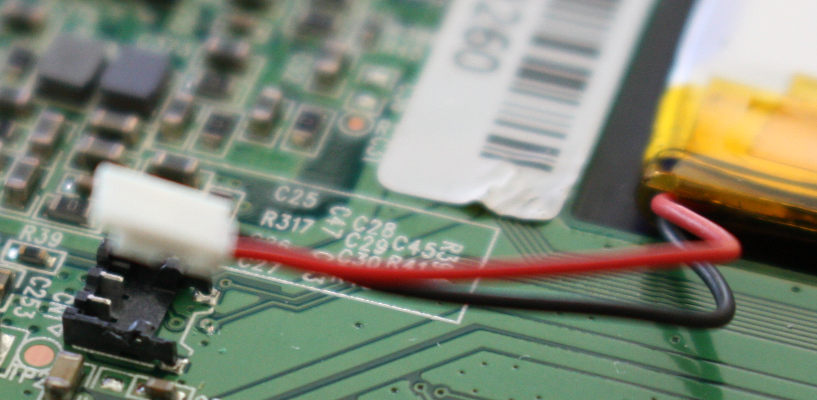 |
You need to remove the circuit board from the Kobo. | Soldering near the Li-ion battery could cause an explosion. | |
| Angle up slightly under the wired end of the white plug, then push out towards the wires with a fingernail. | There are two small black bosses holding the white plug in place. | The black plastic is very soft and easily damaged. | |
Unplug the CON3 and CON5 flat ribbon cables from the circuit board.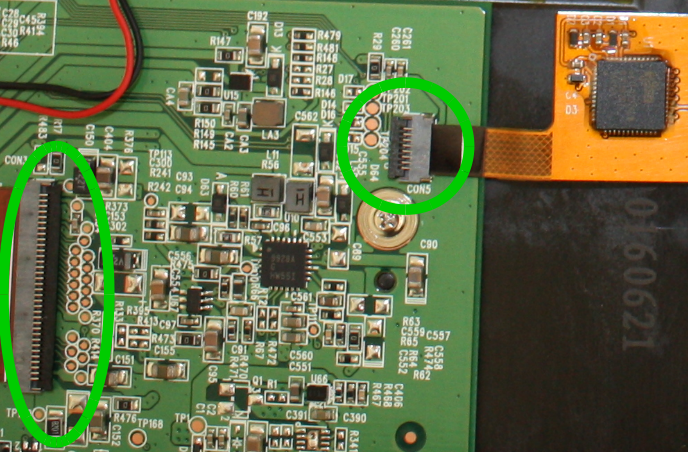 |
Lift the black lock from the side opposite the ribbon.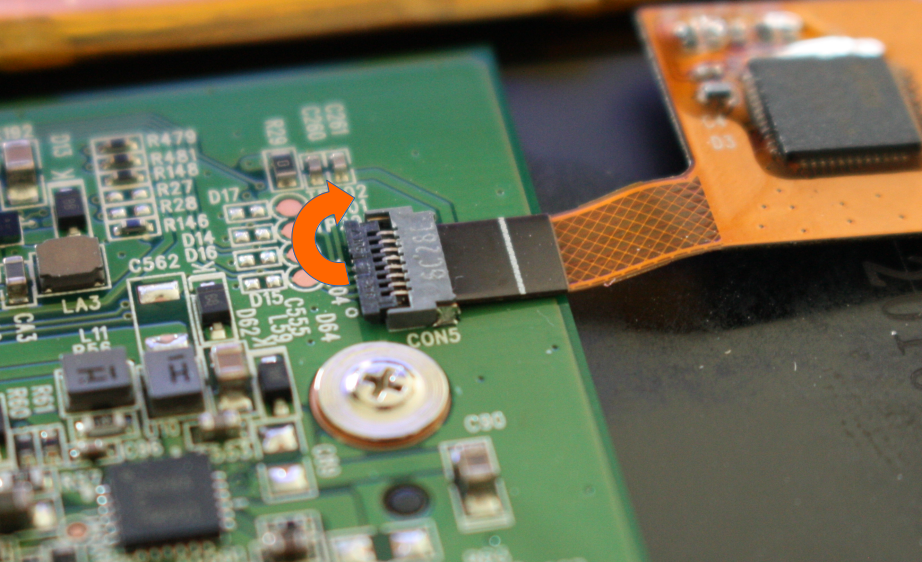 |
||
Pull the ribbon gently, by grasping the sides.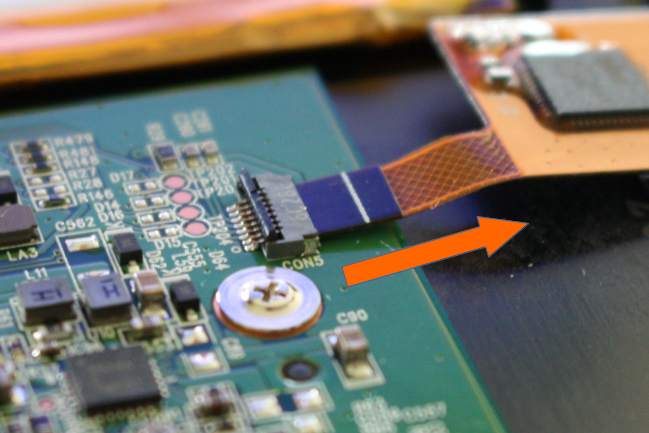 |
|||
Unplug the small ribbon cable under the CON3 cable.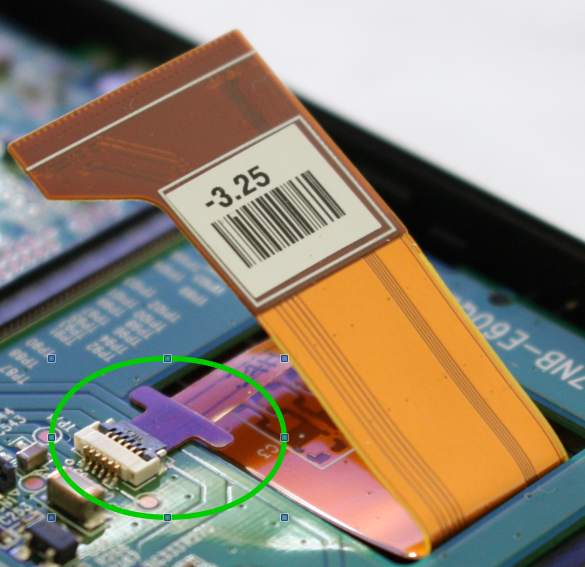 |
Lift the black lock from the side facing the ribbon (different from CON3 and CON5)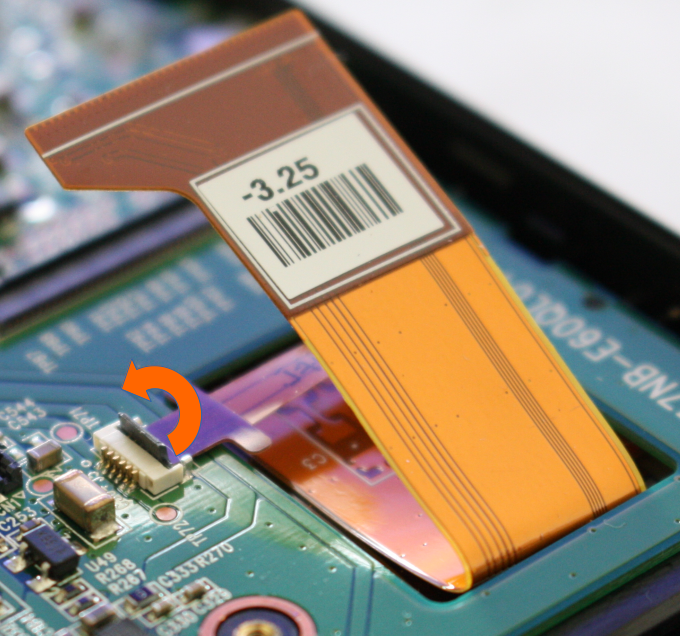 |
||
| Pull the ribbon gently, by grasping the sides. | |||
| Remove the circuit board | |||
Remove the four screws.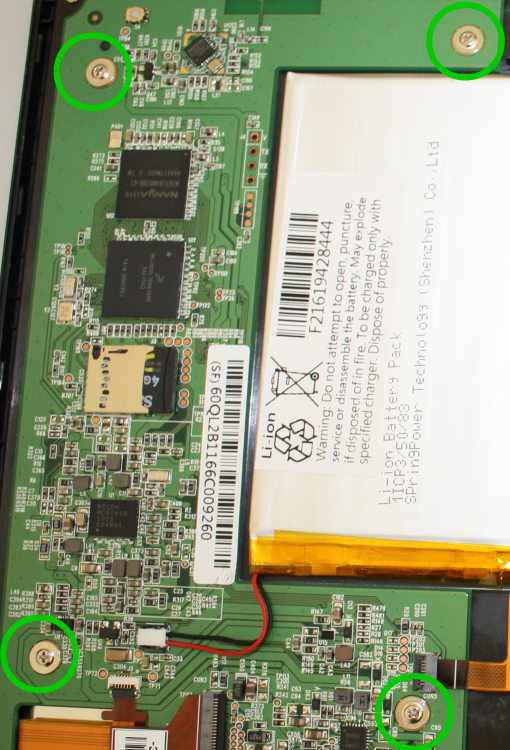 |
|||
| Lift the end of the circuit board opposite the micro USB socket about 30 degrees. | This frees the USB socket and a case boss that pokes through from under the board. | ||
| Carefully push the ribbons through the hole in the case. | |||
| Pull the circuit board out away from the USB socket and remove it from the case for soldering. | The USB socket is easy to damage. Be careful with leverage. | ||
| Drill two small holes in the end of the case for a safety lanyard. | Use a drill press or a hand drill with a stop. | You can easily damage the screen if the drill goes too far. | Option: Remove the screen from the case before drilling. It is held in by four screws and pressure sensitive adhesive. |
| Locate the connection points for V, TX and RX on the board. | 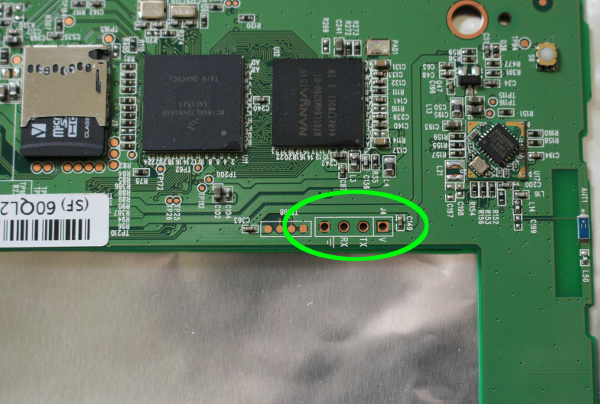 |
||
Solder the Tx, Rx and Vin wires to the board.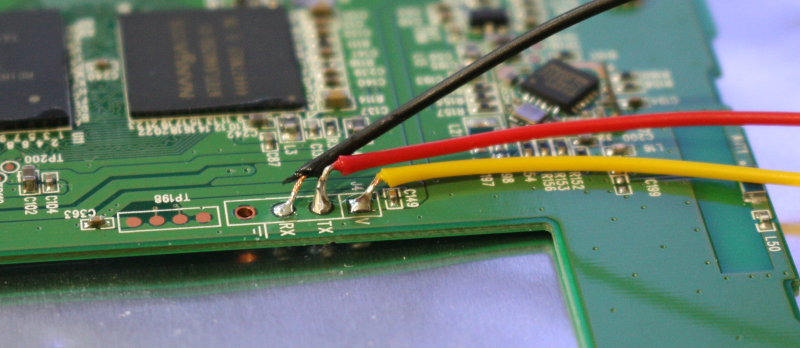 |
Work quickly with a clean soldering iron, and ensure that there is minmal length protruding from the other side of the board so that it fits in the case. | Avoid over-heating the board. | Congratulations! Your warranty is now null and void. |
Tape the wires down to the board.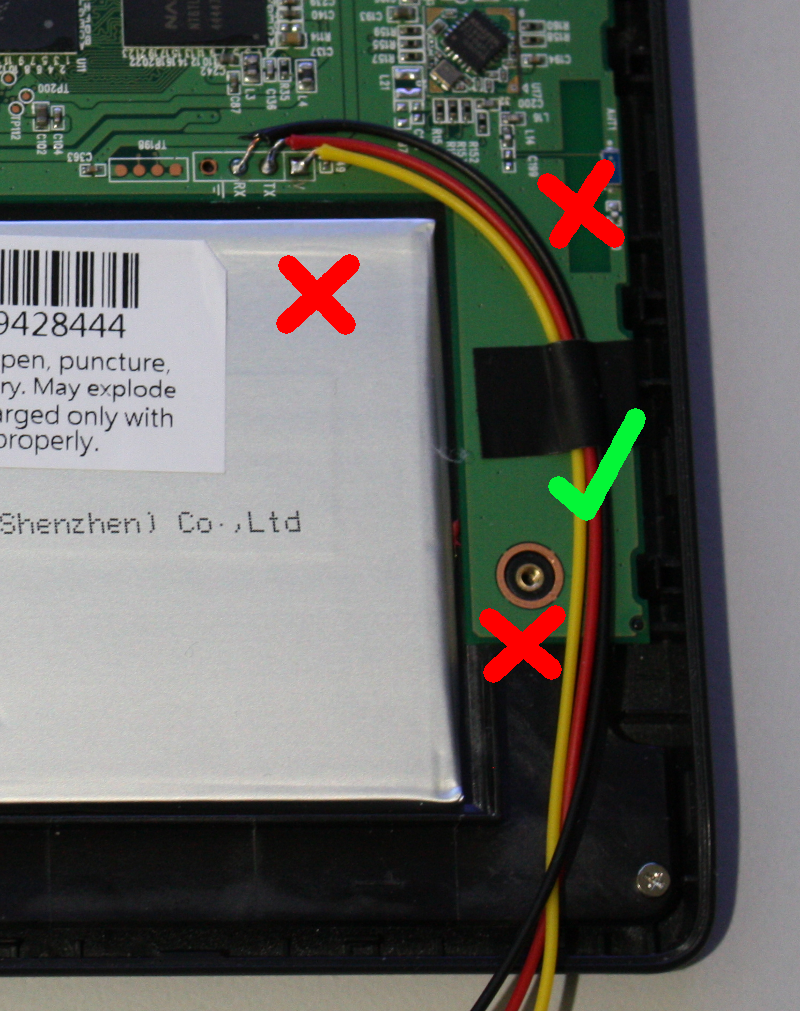 |
Avoid the battery, antenna and screw point. | The case needs to close easily, and you will be connecting the ground wire to the screw point. | Be careful not to flex your solder joints - they may become unreliable later. |
Connect the Ground wire to the board.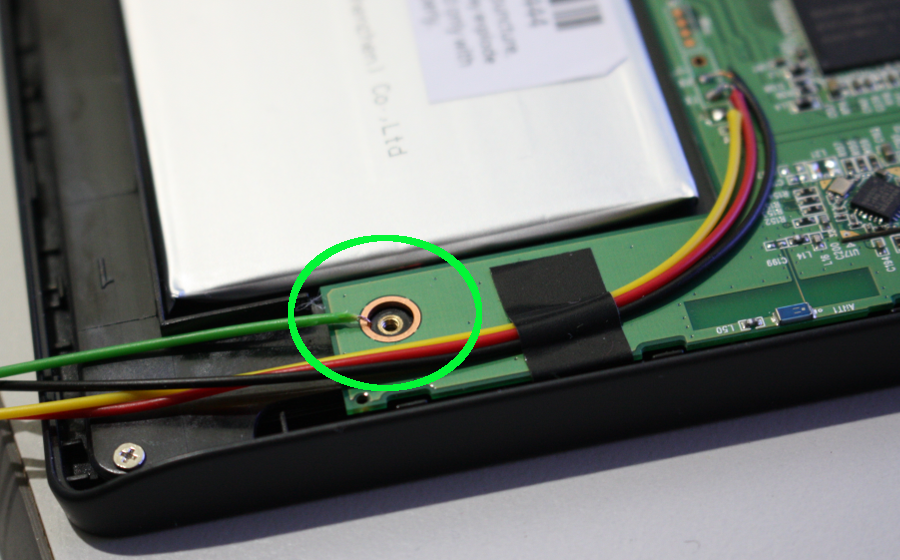 |
Fold the wire into a hook and clamp under the screw nearest your soldered wires. | Soldering might be too hot because the ground connection would conduct heat away to the rest of the board. | |
| Strip, but do not tin | The screw will spread the copper strands for greater contact area. | ||
| Bend the cable back under the screw hole. | There is copper contact under the board as well as on top. | ||
Insert the screw firmly, compressing the copper. |
|||
| Replace the remaining three screws. | |||
| Re-insert the battery plug into the circuit board socket. | Push down gently, then forward with a fingernail above the cables until you feel a slight click. | Avoid leaving the plug partially inserted. | |
| Test your Kobo | Check power (LED), screen and touch functions | No point re-assembling if something is not working. | |
Trim the case to accommodate the wires.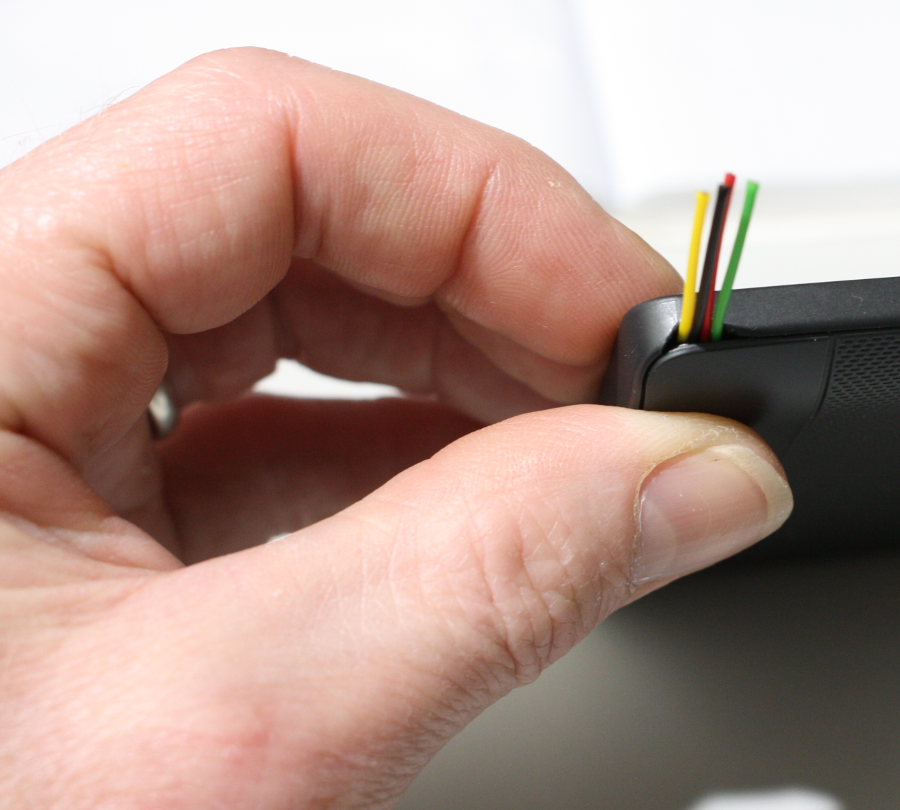 |
Use a sharp craft knife. | Always cut away from yourself! | |
| Tape the wires in place near the exit point. | Small piece of electrical tape | Avoids jamming wires when replacing the cover. | Make sure the wires exit the case in the order you will solder them to the BlueFly. (see below) |
Tin the four wires and solder to the BlueFly. |
Order from left to right when viewing the bottom of the BlueFly circuit board is Ground, RX, TX, Vin. Red is on TX on the motherboard, Red is on RX on the BlueFly.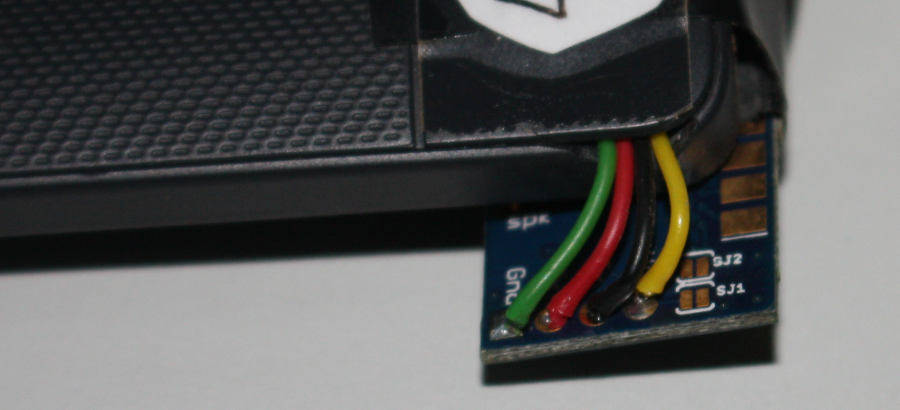 |
Leave enough slack to position the BlueFly where you want to attach it to the Kobo case. | |
| Cover the pressure sensor on the bluefly with a dark case or tape. | 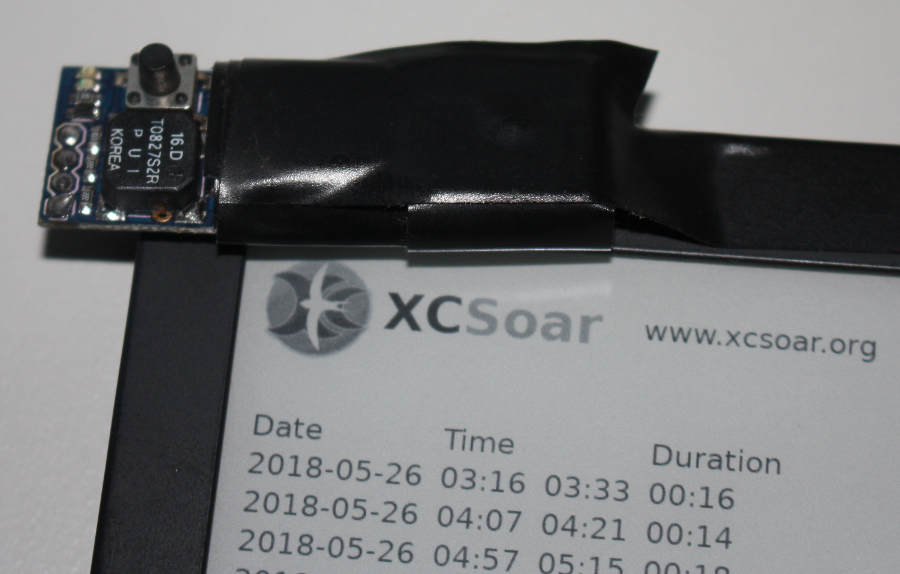 |
The instrument is light-sensitive, and must be kept in the dark. | The temporary setup shown here is not waterproof. Ensure you can access the on/off button, and there is at least a small hole in the case. |
Fly to goal. |
Using a little skill, and a lot of luck. | Always carry a backup instrument, and for long flights, ensure you plug an external battery into the Kobo via USB. |